


Dry a dog in three stages: squeeze the water out with your hands, press it out with a towel rather than rubbing, then finish with a dryer on a low warm setting while brushing the coat in sections. Never let a thick coat air dry. Damp held against the skin is what causes mats, smell and most skin trouble after a bath.
Drying is the step almost everyone rushes and it is the one that determines whether a bath helped or hurt. A dog can be washed with the best shampoo in the world and still end up matted and smelling by the next evening if the coat was left damp at the skin.
The problem is that a coat feels dry on the outside long before it is. Under a thick ruff, in the armpits, in the groin and along the belly, water can sit for six or seven hours after a bath. That is more than enough time for hair to compact and for a smell to develop.
Here is how to do it properly, how long it should take, and the areas that stay wet longest.
Why Drying Matters More Than the Bath
Water sets tangles
Wet hair swells slightly, packs down and then dries in whatever shape it was left in. A loose tangle that would have combed out in seconds before the bath becomes a firm mat once it has dried compacted.
This is also why brushing has to happen before the bath rather than after. Anything left in the coat when the water hits it is being set in place. The reasoning is covered in why water makes mats worse.
Damp skin is a problem in itself
Skin that stays wet under a coat, particularly in a fold or an armpit, is where most post-bath irritation starts. Air cannot reach it and the coat holds the moisture in place.
Smell
The classic wet dog smell is not the water, it is what happens on damp skin over the following hours. A dog that smells worse two days after a bath than it did before was almost certainly not dried properly.
Cold
Puppies, small dogs, thin-coated breeds and older dogs all lose heat quickly when wet. Drying is a welfare issue for them, not just a coat one.
The Three Stages
Stage one: squeeze
Before you reach for a towel, run your hands down the coat and squeeze. Start at the neck and work back, squeezing legs, tail and ears. On a long or thick coat this removes a surprising amount of water and it costs you thirty seconds.
Let the dog shake. A shake removes a large proportion of the water in the coat and is far more efficient than anything you will do by hand. Stand back and let it happen rather than trying to prevent it.
Stage two: towel
Press and squeeze with the towel. Do not rub. Rubbing a wet coat in circles is exactly the motion that creates mats, and on a curly or long coat it can undo a whole grooming session in two minutes.
Work the towel down into the coat rather than over the top of it. On a double coat, most of the water is under the guard hairs and a towel skated over the surface reaches almost none of it.
Use more than one towel. A saturated towel stops absorbing. Microfibre drying towels hold considerably more water than an old bath towel.
Stage three: dry and brush together
This is the stage most people skip. Use a dryer on a low warm setting, and brush the section you are drying as you go.
Drying and brushing together does two things at once. It gets the air to the skin, which is where the water is, and it separates the hair as it dries so it sets straight rather than compacted. On curly coats this is the difference between a fluffy finish and a felted one.
Work in sections, from the bottom of the dog upward, and do not move on until that section is dry at the skin.
Recommended Tools for Drying a Dog
Drying properly starts with a wash that leaves the coat easy to separate, and then needs a brush you can use one-handed while the other hand holds the dryer.

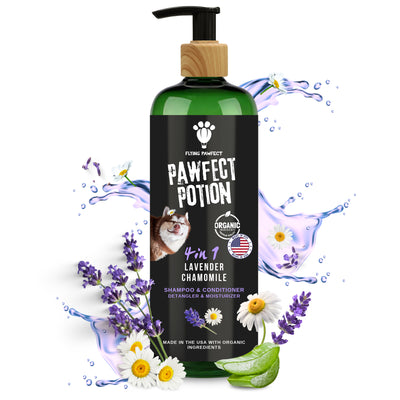
Pawfect Potion 4-in-1 Shampoo
How easily a coat dries depends partly on what you washed it with. A coat left dry and stripped tangles as it dries, and a coat with product residue in it dries stiff.
This formula cleans, conditions, detangles and moisturises in one pass, and rinses out cleanly. It is pH balanced for dogs and uses plant-derived cleansers from coconut with organic aloe vera and coconut oil, plus lavender and chamomile.
The detangling and conditioning show up during drying rather than during the wash. A conditioned coat separates under the brush as it dries instead of clumping, which shortens the whole session.
Rinse thoroughly. Residue left in a coat is a common cause of both stiffness and itching, and on a thick coat it takes longer to rinse than most people allow.
Brush and comb-check before the bath, always. That one rule prevents most post-bath matting on its own.
- Best for: All coat types, sensitive skin, and coats that are difficult to dry.
- Why it works: A conditioned, well rinsed coat separates as it dries rather than clumping together.
- Context: Brush first, wash, rinse thoroughly, then dry and brush together.

Flying Pawfect Slicker Brush
Brushing while you dry is the single technique that separates a good bath from a bad one, and it needs a brush that can open a damp coat without dragging.
The fine stainless steel pins pass between the guard hairs and lift from underneath, which is what lets warm air reach the skin. Drying the surface while the undercoat stays wet is the most common mistake, and a brush that reaches through is how you avoid it.
The pins are smoothly finished with a slight bend, so working on a damp coat, which is more fragile than a dry one, does not break hair or scratch skin.
The flexing cushion pad gives way against skin, which matters when you are working one-handed with a dryer in the other hand and paying less attention to pressure than usual.
The handle sits in the palm rather than the fingertips, which is genuinely useful during a drying session where one hand is already occupied.
Work bottom to top in sections. Brush the section you are aiming the dryer at, in short strokes from the skin outward, and only move on once the hair at the skin feels dry.
- Best for: Drying double coats, curly coats and long coats, and everyday brushing between baths.
- Why it works: It opens the coat so warm air reaches the skin, and separates hair so it dries straight instead of compacted.
- Context: Brush before the bath, then brush again in sections while drying.
Step by Step: How to Dry a Dog Properly
- Step 1. Squeeze water out with your hands, working from neck to tail, then down each leg and the tail itself.
- Step 2. Let the dog shake. It removes more water in two seconds than a towel does in a minute.
- Step 3. Press and squeeze with a towel, working it down into the coat. Never rub in circles.
- Step 4. Swap to a second dry towel once the first is saturated.
- Step 5. Start the dryer on a low warm setting, held a hand's width away and kept moving.
- Step 6. Dry in sections from the bottom up, brushing each section as you go, from the skin outward.
- Step 7. Finish with the awkward areas: armpits, groin, belly, behind the ears and the base of the tail.
- Step 8. Test by parting the coat with your fingers. If the skin feels cool or damp, that section is not done.
The Areas That Stay Wet Longest
- The ruff and neck. The thickest part of most coats, and usually under a collar as well.
- Armpits and groin. Enclosed, warm, and impossible for air to reach on its own.
- The belly. Faces downward, so gravity works against you and the dog lies on it.
- Behind the ears. Fine hair, thick underneath, and a common mat site anyway.
- The base of the tail and the trousers. Dense, long, and usually the last place anyone checks.
- Between the toes. Rarely dried at all, and a frequent source of licking and irritation.
Air Drying, Towels and Dryers
Air drying
Acceptable only for short smooth coats in a warm room. On anything thicker it leaves the skin damp for hours, which is the cause of most post-bath problems.
Towels
Essential, and better than most people's version of them. Use several, press rather than rub, and consider a microfibre drying towel, which holds far more water than a standard bath towel.
Human hairdryers
Usable on the lowest heat setting, held well back and kept moving. They run hotter than dog dryers, so the risk is burning skin you cannot see under the coat. Never hold one still, and never use a hot setting.
Dog dryers
A high-velocity dryer blows water out of the coat rather than evaporating it, which is faster and cooler. It is also loud, so introduce it gradually and away from bath day the first few times. This is what makes a professional groom leave a double-coated dog shedding so much less.
For curly coats specifically, drying technique determines the finish, and the detail is in blow drying techniques to prevent matting in doodles.
Common Mistakes When Drying a Dog
Rubbing with a towel. The circular motion is precisely what creates mats. Press and squeeze instead.
Letting a thick coat air dry. The surface dries, the skin stays wet for hours, and that is where smell and irritation come from.
Drying without brushing. The coat dries compacted rather than separated, which is how a clean dog ends up matted.
Using a hot setting. You cannot see the skin under the coat, and burns happen. Low and warm, always moving.
Stopping when the surface feels dry. Part the coat and check at the skin. That is the only test that means anything.
Skipping the awkward areas. Armpits, groin and belly are the slowest to dry and the most likely to cause trouble.
Putting a harness or collar back on a damp dog. Friction plus damp is the fastest mat there is.
How Long Should It Take
Short smooth coat: five to ten minutes with towels alone.
Medium coat: fifteen to twenty minutes with a towel and a dryer.
Double coat: thirty to forty-five minutes, and longer during a seasonal shed.
Curly or long coat: thirty minutes to an hour, brushing throughout, because the finish depends entirely on how it was dried.
If that sounds like a lot, it is worth remembering that a rushed dry usually costs more time later, in dematting, in a re-wash, or in a groomer's appointment. The order of operations around bathing is set out in should you brush a dog before or after bathing.
FAQs
Can I let my dog air dry?
Only a short smooth coat in a warm room. On anything thicker the skin stays damp for hours, which causes matting, smell and skin irritation.
Can I use my own hairdryer?
On the lowest heat setting, held well back and kept moving constantly. Human dryers run hotter than dog dryers and the skin under a coat is easy to burn without seeing it.
How do I know when my dog is actually dry?
Part the coat with your fingers and touch the skin. If it feels cool or damp, that area needs more time regardless of how the surface feels.
Why does my dog smell after a bath?
Almost always because the coat did not dry to the skin, most often in the ruff, armpits or groin. Drying properly usually solves it completely.
Should I brush while drying?
Yes. It is the most important part of the process. Brushing as you dry separates the hair so it sets straight, and it lets air reach the skin.
My dog is frightened of the dryer. What can I do?
Introduce it separately from bath day. Run it in another room, then in the same room, then briefly on the dog's shoulder, over several sessions. Towel dry in the meantime.
Are microfibre drying towels worth it?
Yes. They hold considerably more water than a bath towel, which means fewer towels and less handling of a wet dog.
What about drying a puppy?
Towel dry mostly, keep the room warm, and introduce a dryer gently and briefly. Puppies lose heat quickly, so do not leave one damp.
Final Thoughts
The bath is the easy part. Drying is where the result is decided, and the whole method fits in one line: squeeze, press with a towel, then dry and brush together in sections until the skin is dry.
Check by parting the coat rather than by touching the surface, and give the armpits, groin and ruff the extra minutes they need.